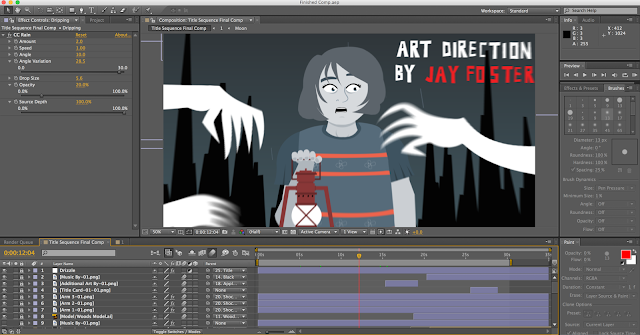
My Title sequence was composited in Adobe After Effects using vector-based assets created in Illustrator. After Effects is ideal for compositing sequences of 2D motion graphics as it's user interface is very similar to Photoshop. The aesthetic of my animation is more in keeping with motion graphic title sequences rather than traditional full animation, with emphasis on the arrangement and composition of imagery.
The layers in my project are generally organised in the order in which they appear sequentially in the animation. As there is a lot of motion in my title sequence, with movement of the camera, I enabled motion blur in order to achieve a more natural filmic look.
One of the most immediately recognisable pieces of imagery from the book is the blood-red full moon which is why I decided to start off my title sequence with it. The prologue of the book also contains this imagery accompanied by a snowy scene with a hooded blue figure making their way through a blizzard, so I decided to combine these two elements to create the opening shot of my animation. I wanted to give the impression that the hooded character was making their way through a blizzard in the opening shot, so I animated a character whose hood blew in the wind in Photoshop before importing it into After Effects as footage. This is one of the only assets in my project created in Photoshop, and that is non-vector/raster based.
Most of the environmental effects featured in my title sequence were created in After Effects using the effects filters. The snow in the opening shot and the water dripping in the cave derive from preset effect options in After Effects, though initially I did consider creating the individual assets in Illustrator separately.
Originally, for the cave shot I included a light sweep on the main character's lantern, however my tutor did not feel it fit with the aesthetic of the title sequence as a whole. Upon reflection, the light sweep does stand out amongst the composition. That coupled with the poor way in which I implemented it and the effect the sweep of light had on the edges of the frame led me to scrap this idea for the final animation.
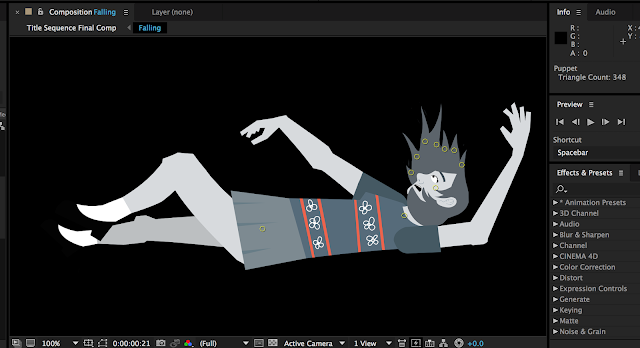
The main character in my animation has a number of different models requiring different degrees of mobility. Probably the most animated of these is the first model of the character falling. For this I created the model in a separate composition, animating the limbs using the puppet pin tool. In order to give the illusion of falling I also used puppet pins to animate the hair blowing in the wind as the character descends. The model of the character in the cave was also complex and animated using the same method, however with more facial detail. I also used puppet pins on the hair of the character to simulate secondary action in order to give the movement of her head more believability.
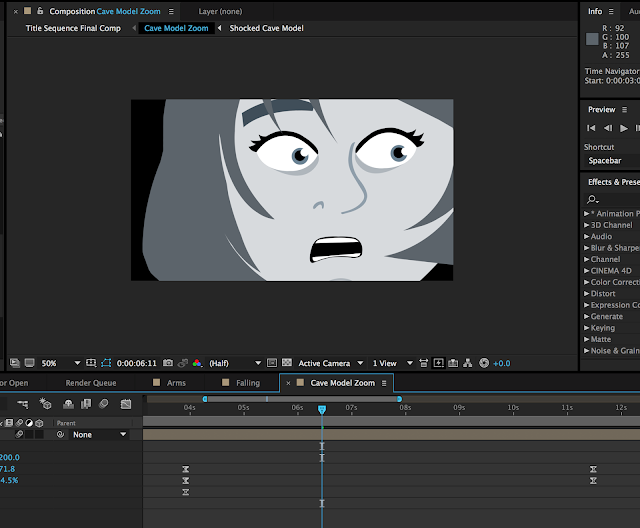
During the early stages of compositing my title sequence I was considering straying away from my animatic when the camera zooms in on the character's pupil before it turns into an apple with a bite taken out of it. This was because I was not aware you could import Illustrator files directly into After Effects and up until this point i had been importing the files saved out of illustrator as PNGs. These appeared too blurry when zoomed in properly so I opted for a different method of transition between scene with the lantern illuminating the camera with a blinding white light. However, most of my peers found this transition jarring and not in keeping with the style of the sequence up until this point, which was a single continuous camera move. So, I instead opted to go by my storyboard and imported the Illustrator file into After Effects, retaining the layer sizes and reworked the animation so that when I zoomed into the character's face for the transition, the assets didn't get all blurry. It worked and the intended effect is, in my opinion, stronger than the compromise I almost ended up going with.
One of the biggest problems I had with my animation came to fruition when it came to render it out in After Effects. The image buffer size was too large for the project and as a result kept crashing when it came to rendering out my animation. To amend this I used the college computers and rendered the project off the native disk rather than my external hard drive, as I was told this may be one of the factors causing it to crash. Still, the final render did end up taking a lot longer than I would have hoped thanks in no small part to me overloading the project files. In the future I will be sure to work on my After Effects projects in smaller, much more manageable chunks in order to bypass this frustration.
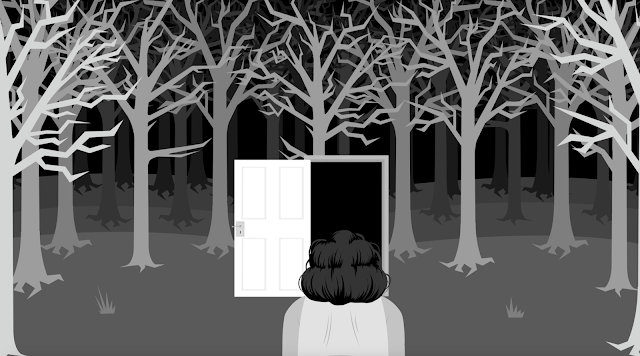
Overall I am satisfied with how closely my final animation follows my animatic, however I do wish that I could go back and simplify the graphics and colour palette somewhat. I feel that while I do think my animation effectively mimics the stylings of the book, I would have liked to incorporate more textures, maybe creating my own from found objects such as newspaper clippings or cardboard cutouts. Another area I feel I could have improved upon given more time is the typography, which I feel could have had some more creative application and placement within the scenes, making use of distortion and perspective a little more. I did apply a drizzle effect to the text which appears in the cave to reflect the water dripping from the rock, however I feel this effect kind of passes by a little too fast on screen and I would have liked to experiment with those sorts of motifs a little more in my title sequence. The last shot of the girl standing in front of the door in the middle of the woods was also a little static requiring a little more animation next time. I feel that it would have been improved had I shown her walking through the door or by showing something, a creature maybe coming out of it, and as it stands the last shot falls a little flat for me.


No comments:
Post a Comment